Since the outset, Anbox Cloud was developed with a variety of use cases for running Android at scale. Cloud gaming, more specifically for casual games as found on most user’s mobile devices, is the most prominent one and growing in popularity. Enterprises are challenged to find a solution that can keep up with the increasing user demand, provide a rich experience and keep costs affordable while shortening the time to market.
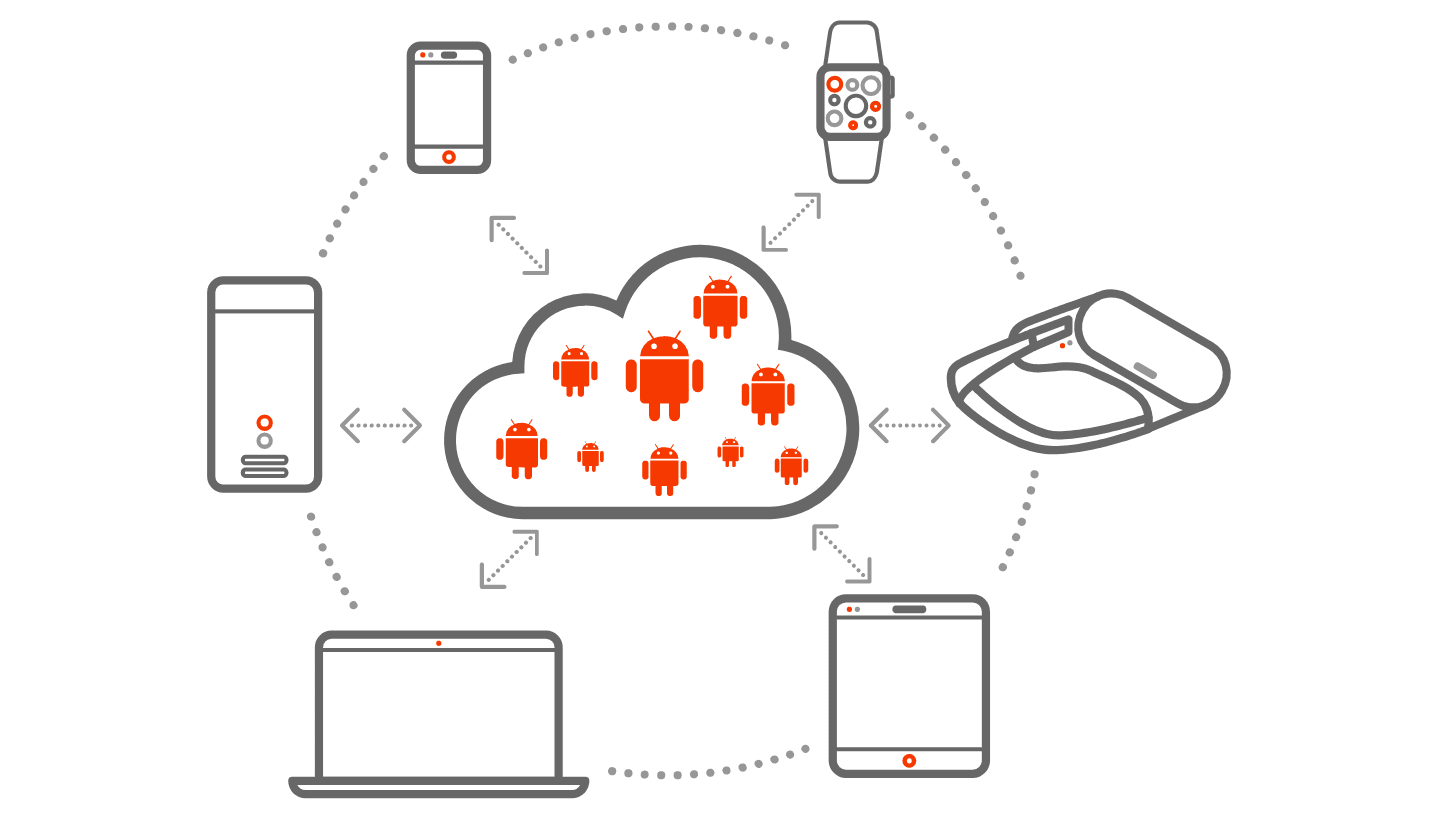
Anbox Cloud brings Android from mobile devices to the cloud. This enables service providers to deliver a large and existing ecosystem of games to more users, regardless of their device or operating system. Existing games can be moved to Anbox Cloud with zero to minimal effort.
Canonical has built Anbox Cloud upon existing technologies that allow for a higher container density compared to traditional approaches, which helps to reduce the overall cost of building and operating a game streaming service. The cost structure of a casual game, based in the cloud, also shows that density is key for profitability margins. To achieve density optimisation, three factors must be considered: container density (CPU load, memory capacity and GPU capacity), profitability and user experience optimisation. Additional considerations include choosing the right hardware to match the target workload, intended rendering performance and the pricing sensitivity of gamers. Finding the optimal combination for these factors and adding a layer of automation is crucial to improve profitability margins and to meet SLAs.
To further address specific challenges in cloud gaming, Canonical collaborates with key silicon and cloud partners to build optimised hardware and cloud instance types. Cloud gaming has a high demand on various hardware components, specifically GPUs which provide the underlying foundation for every video streaming solution. Utilising the available hardware with the highest density for cost savings, requires optimisation on every layer. Anbox Cloud specifically helps to get the maximum out of the available hardware capacity. It keeps track of resources spent by all launched containers and optimises placement of new containers based on available capacity and resource requirements of specific containers.
Next to finding the right software and hardware platform, cloud gaming mandates positioning the actual workload as close to the user as possible to reduce latency and ensure a consistent experience. To scale across different geographical regions, Anbox Cloud provides operational tooling and software components to simplify the deployment without manual overhead and ensures users get automatically routed to their nearest location. By plugging individual regions dynamically into a control plane allows new regions to be easily added on the go without any downtime or manual intervention.
Anbox Cloud builds a high-density and easy-to-manage containerisation platform on top of the LXD container hypervisor which helps to minimise the time to market and reduce overall costs. It reflects Canonical’s deep expertise in cloud-native applications and minimises operational overhead in multiple ways. With the use of existing technologies from Canonical like Juju or MAAS, it provides a solid and proven platform which is easy to deploy and maintain. Combined with the Ubuntu Pro support program from Canonical, an enterprise can ensure it gets long-term help whenever needed.
As differentiation is key in building a successful cloud gaming platform, Anbox Cloud provides a solid foundation which is extensible and fits into many different use cases. For example, integrating a custom streaming protocol is possible by writing a plug-in and integrating it via provided customising hooks into the containers which power Anbox Cloud. To make this process easy, Canonical provides an SDK, rich documentation with example plugins and engineering services to help with any development around Anbox Cloud.
In summary, Anbox Cloud provides a feature rich, generic and solid foundation to build a state of the art cloud gaming service which provides optimal utilisation of the underlying hardware to deliver the best user experience while keeping operational costs low.
If you’re interested to learn more, please come and talk to us.
Android is a trademark of Google LLC. Anbox Cloud uses assets available through the Android Open Source Project.
The stable release of LXD, the system container and VM manager, is now available. LXD 5.21 is the fifth LTS release for LXD, and will be supported for 5 years, until June 2029. This release significantly steps up LXD’s abilities in comparison to LXD 5.0 LTS, especially when operating in clustered environments. LXD 5.21.0 will be licensed under AGPL-3.0-only, in line with the change we announced last year. The conditions of the license are designed to encourage those looking to modify the software to contribute back to the project and the broader community. We hope you’ll enjoy what’s in store in this release. Before we jump into features, let’s start with some general changes that come with the new LTS.
Change of version numbering scheme
Starting with this release we are changing the numbering scheme. This is the first LTS release that won’t use the n.0.n format, e.g. 6.0.x, and instead it will be 5.21.x.
What we have followed so far is that each LTS would start a new major version (e.g. 5.0) and each monthly feature release would build on that major version (e.g. 5.1. … 5.20). However, that seemed strange from the perspective of the LTS being an accumulation of all the work that has gone into the monthly releases over the past two years. This is why we decided to change the naming scheme to better reflect that the LTS represents the end of the cycle, rather than the beginning.
Going forward, the last of the monthly releases in the two-year LTS cycle will become the next LTS, in this case, 5.21.0. Then, we will restart the cycle with the first monthly release following the new major version number (e.g. 6.x). To avoid unexpected results for people who assumed the next LTS series would be 6.0.x we will not be releasing LXD 6.0, and the next feature release after this one will be LXD 6.1.
LXD UI is now available by default
As we announced, we now have a dedicated team working on the LXD graphical user interface. We are happy to share that the LXD UI is deemed production grade and is now enabled by default in the LXD snap. We will continue to work on ensuring feature parity of the UI with the CLI.
Keep in mind that the external listener must still be enabled explicitly by setting core.https_address as outlined in the documentation.
What’s new in LXD 5.21.0 LTS?
Over the past two years, we have steadily been enhancing LXD capabilities to become an even more robust and featureful infrastructure tool. In addition to general features, some of the areas we are addressing are aimed at clustered environments, such as when deploying our newly launched MicroCloud solution, which builds on LXD.
Authentication and authorization revamp
As part of a push to provide a more industry-standard solution to authentication and authorization in LXD, we’ve added support for OpenID Connect for authentication and additional mechanisms for fine-grained authorization. The combination of these features will allow users to perform secure authentication and fine-grained access control. With the features completed in LXD, this will also be added to the UI in the coming months.
Please note that due to the change in the database, all users who currently authenticate to LXD with OIDC will temporarily lose access to their cluster, and will have to follow these steps to authenticate.
As part of this work, the support for Canonical’s Candid RBAC service has been removed as it is in the process of being deprecated. LXD still supports external OIDC and TLS certificates for authentication.
Storage enhancements: Object storage and PowerFlex support
To cover a wider variety of use cases, we are continuously evaluating adding new storage options and enhancing existing ones. In this LTS, we added support for object storage as well as support for Dell PowerFlex as another option for remote storage.
Object storage on Ceph and local storage pools
LXD now has support for object storage.
We’ve achieved this by adding a whole new concept of storage buckets along with a dedicated command (lxc storage bucket) and APIs. This allows LXD users to create new storage buckets, assign them a size limit and then manage access keys to that bucket. The bucket has its own URL with an S3 API.
For Ceph, we are using its rados gateway providing the S3 API.
For other storage drivers, we are using MinIO project, which lets us offer an S3 compatible API directly from a local storage driver. Please note that this requires an externally provided MinIO server binary, by setting the minio.path setting.
There are various enablement activities between Dell and Canonical as a part of our ongoing partnership. The latest of them is adding support for LXD to interface directly with its PowerFlex service in order to allow LXD instances to be run on its platform. This offers an alternate remote storage option for enterprise use cases, where currently supported storage drivers may not be preferred.
Due to its design, PowerFlex is another LXD storage driver offering remote storage capabilities similar to the already existing implementation for Ceph RBD.
Virtual Machines: Live migration, AMD SEV, non-UEFI support and ISO volumes
Since introducing support for virtual machines 4 years ago we’ve been adding a variety of features to not only ensure feature parity with system containers but also make sure to cover a wide range of our user’s use cases. Some of the highlights for this LTS are support for live migration, non-UEFI VMs and ISO volumes, as well as enabling AMD SEV.
Fast live migration for virtual machines
This release enables a much-improved VM live migration process, eliminating much of the perceivable downtime. Previously, LXD relied on the stateful stop function, which is the ability to write all the running memory and CPU state to disk, then stop the virtual machine, move it to a new system and start it back up again from where it was using the stored state. The improved functionality, on the other hand, allows the source and target servers to communicate right from the start of the migration. This allows for performing any state transfer in the background directly to the target host while the VM is still running, then transferring any remaining disk changes as well as the memory through multiple iterations of the migration logic and finally cutting over to the target system.
LXD now supports AMD SEV for memory encryption of virtual machines.
On compatible systems (AMD EPYC with firmware and kernel support enabled), setting security.sev to true will have the VM get its memory encrypted with a per-VM key handled by the firmware.
Systems supporting AMD SEV-ES can then turn on security.sev.policy.es to also have the CPU state encrypted for extra security.
Lastly, LXD also supports feeding custom session keys. Combined with LXD’s existing vTPM support, this feature can be used to ensure that the firmware is set up with those user provided keys and that the host operator doesn’t have any ability to tamper with the VM.
LXD virtual machines have been designed to use a very modern machine definition from the start. This means LXD VMs offer a QEMU Q35 machine type combined with a UEFI firmware (EDK2) and even Secure Boot enabled by default.
While this works great for modern operating systems, it can be a problem when migrating existing physical or virtual machines into LXD as those machines may be using a legacy firmware (BIOS) and not be bootable under UEFI.
This can now be addressed by setting security.csm to true combined with disabling UEFI Secure Boot by setting security.secureboot to false. This switches QEMU to boot via Seabios directly rather than through EDK2.
It is now possible to upload ISO image files as custom storage volumes. These can then be attached to a virtual machine as a bootable CD disk allowing simplified installation of custom operating systems from a “library” of custom ISO volumes.
The instance placement scriptlet feature was added to enable a better alternative to LXD’s default instance placement algorithms. Instead of the default behavior of placing a new instance on whichever cluster member was hosting the fewest instances, this new feature allows users to make a more deliberate choice. Now, users can provide a Starlark scriptlet that decides which cluster member to deploy the new instance on based on information about the new requested instance as well as a list of candidate cluster members. Importantly, while scriptlets are able to access certain information about the instance and the cluster, they cannot access any local data, hit the network or even perform complex time-consuming actions.
A commonly requested feature by those using LXD with Ceph and OVN, it’s now possible to have LXD automatically recover from a cluster member failure by effectively evacuating all instances to other systems.
This can only work with Ceph backed instances which don’t rely on any server-specific device or configuration.
This is controlled by a new cluster.healing_threshold which defines a number of seconds after which a cluster member is considered to be offline and its instances relocated.
Following the removal of shiftfs from the Ubuntu kernel (from Mantic onwards) LXD has now also dropped support for shiftfs. The preferred way for container filesystems to have their UID/GID mappings dynamically shifted is with idmapped mounts. In recent kernels this is now supported for ZFS and Cephfs filesystem (in addition to the long standing support for ext4, xfs and btrfs filesystem).
The features outlined above are only the major highlights of this release. You can read the detailed announcement with a complete changelog on our discourse.
The VMware world has seen a lot of upheaval in recent months, and now there’s another change to add to the list: the ESXi hypervisor, one of VMware’s most notable products, is no longer free.
VMware ESXi is a type 1 hypervisor that allows users to create and manage virtual machines that can access hardware resources directly. It comes with various management tools, the most familiar being vSphere and vCenter Server, and supports many advanced features such as live migration, high availability, and various security options among others.
The free option for ESXi only covered a limited number of cores, with other limitations in terms of memory and management options. As such, rather than being used in production, it was mostly used by developers and hobbyists who are now left looking for an ESXi alternative.
Try LXD – an open source ESXi alternative
While LXD is mostly known for providing system containers, since April 2020 and the 4.0 LTS, it also natively supports virtual machines. VM support was initially added to expand the variety of use cases LXD could cover, such as running workloads in a different operating system, or with a different kernel than that of the host, but over the years we have been enhancing the experience and making LXD a modern open source alternative to usual hypervisors.
While the main functionality doesn’t differ much from other VM virtualization tools, we want to provide a better experience out of the box with pre-installed images and optimised choices. The workflow is fully image-based, and in addition to the images provided through a built-in image server, users can also upload custom ISO images for their specific use cases. For easy management, in addition to an intuitive CLI, LXD now also provides a web user interface.
LXD VMs are based on KVM through QEMU, like other VMs you would get through libvirt and similar tools. However, LXD is opinionated about the setup and the experience, placing security at the forefront, which is why we use a modern Q35 layout with UEFI and SecureBoot by default. All devices are virtio-based (we don’t do any complex device emulation at the host level).
Recently, we have also added an option for running non-UEFI based workloads, allowing users to run less modern virtual machines without issues, provided that they specifically enable the security option allowing them to do so.
Why pick LXD as an ESXi alternative? Because LXD is fully open source, with its full functionality available without any restrictions. For enterprise use cases, you can opt-in to get support from Canonical via Ubuntu Pro, but you can also consume LXD entirely for free.
LXD vs ESXi – feature comparison
It is difficult to provide a comprehensive comparison with all ESXi features, as they vary between versions and specific combinations with other VMware tools. Nevertheless, the table below provides a summary of the most important ESXi features and how they are supported in LXD.
LXD
ESXi
Software type
Open Source
Proprietary
Basis
KVM
VMkernel
Web UI
Yes
Yes
Clustering
Yes
Yes
High availability
Yes
Yes
VM live migration
Yes
Yes
Shared storage
Ceph
vSAN
Networking
Bridge, OVN
NSX
Snapshots
Yes
Yes
Backup
Yes
Yes
Free trial
N/A (unlimited free usage)
30 days
Pricing
Free, with enterprise support available on a per physical host basis
Full functionality requires a paid licence, differing based on the number of cores
Next, let’s take a closer look at LXD’s capabilities:
Image-based workflow for launching VMs and containers. Built-in image server, with support for custom ISO images as well.
Web UI for easier deployment and management of your workloads
Screenshot of the LXD UI
Projects for multi-tenancy and workload organization
Profiles for defining instance options, device and device options, cloud-init instructions and further instance customizations. Profiles can then easily be applied to any number of instances
Various hardware passthrough options, including PCI, GPU, USB, block devices, NICs, disks
Live VM migration, users can migrate running VMs between hosts with little or no downtime
Backups, snapshots and image transfer support
High-availability through clustering with Ceph and OVN for distributed storage and networking. All these are combined in our MicroCloud solution.
Various storage backend options, including directory, Btrfs, LVM, ZFS, Ceph and Dell PowerFlex
Various networking options, including bridge and OVN for fully controlled networks, and physical, SR-IOV and Macvlan support for external network types
Third-party integrations with tools like Terraform and Ansible are already available, and custom integrations are possible through LXD’s REST API
Get started with LXD
LXD is very easy to set up. Four simple steps are all it takes to get ready to run workloads:
1. On Ubuntu, just run
snap install lxd
2. Then run:
lxd init
This will prompt you to configure your LXD instance. Default options are sufficient in many cases, but make sure to select “yes” when asked whether LXD should be available over the network. This will allow you to access the Web UI.
4. Click on “create instance” to launch your first VM
Can I import my existing VMs into LXD?
While you might be looking for an ESXi alternative, we also understand that users will wish to keep their existing workloads currently running on ESXi (or elsewhere). To import your existing VMs, LXD provides a tool (lxd-migrate) to create a LXD instance based on an existing disk or image. Using this tool, with some extra configuration users are able to import their existing VMs. More details are available in this guide.
Running LXD on Windows?
While LXD is primarily a Linux-based tool, it is also available for Windows users via WSL. WSL allows users to have the full Ubuntu experience on their Windows machines. Here is a practical example of how you can work with web services using WSL and LXD.
Consider trying system containers
If you’re reading this blog, your primary interest is likely to be virtual machines. But system containers are a great alternative that could potentially cover many of your use cases.
System containers are in a way similar to a physical or a virtual machine. However, they utilize the kernel of the host to provide a full operating system and have the same behaviour and manageability as VMs, without the usual overhead, and with the density and efficiency of containers. For almost any use case, you could run the same workload in a system container and not get any of the overhead that you usually get when using virtual machines. The only exception would be if you needed a specific version of the kernel, different from the kernel of the host, for a specific feature of that virtual machine.
LXD has come a long way since its inception and nowadays covers much more than system containers. It is a modern, secure and robust ESXi alternative and also to traditional hypervisors. With its intuitive CLI and web interface, users can easily get started and deploy and manage their workloads easily and intuitively. ESXi users, as well as others looking for a competent, open source virtualization option, should take LXD for a spin.