Vue lecture

Il y a de nouveaux articles disponibles, cliquez pour rafraîchir la page.

Deploying Open Language Models on Ubuntu

This blog post explores the technical and strategic benefits of deploying open-source AI models on Ubuntu. We’ll highlight why it makes sense to use Ubuntu with open-source AI models, and outline the deployment process on Azure.

Authored by Gauthier Jolly, Software Engineer, CPC, and Jehudi Castro-Sierra, Public Cloud Alliance Director, both from Canonical.

Why Ubuntu for Open-Source AI?

  • Open Philosophy: Ubuntu’s open-source nature aligns seamlessly with the principles of open-source AI models, fostering collaboration and accessibility.
  • Seamless Integration: Deploying open-source AI is smooth on Ubuntu, thanks to its robust support for AI libraries and tools.
  • Community: Ubuntu’s large community provides valuable resources and knowledge-sharing for AI development.

The Role of Ubuntu Pro

Ubuntu Pro elevates the security and compliance aspects of deploying AI models, offering extended security maintenance, comprehensive patching, and automated compliance features that are vital for enterprise-grade applications. Its integration with Confidential VMs on Azure enhances the protection of sensitive data and model integrity, making it an indispensable tool for tasks requiring stringent security measures like ML training, inference, and confidential multi-party data analytics.

Why use the public cloud for deploying AI models?

Using a public cloud like Azure gives straightforward access to powerful GPUs and Confidential Compute capabilities, essential for intensive AI tasks. These features significantly reduce the time and complexity involved in setting up and running AI models, without compromising on security and privacy. Although some may opt for on-prem deployment due to specific requirements, Azure’s scalable and secure environment offers a compelling argument for cloud-based deployments.

Provisioning and Configuration

We are going to explore using open models on Azure by creating an instance with Ubuntu, installing NVIDIA drivers for GPU support, and setting up Ollama for running the models. The process is technical, involving CLI commands for creating the resource group, VM, and configuring NVIDIA drivers. Ollama, the chosen tool for running models like Mixtral, is best installed using Snap for a hassle-free experience, encapsulating dependencies and simplifying updates.

Provision an Azure VM

Begin by creating a resource group and then a VM with the Ubuntu image using the Azure CLI.

az group create --location westus --resource-group ml-workload
az vm create \
    --resource-group ml-workload \
    --name jammy \
    --image Ubuntu2204 \
    --generate-ssh-keys \
    --size Standard_NC4as_T4_v3 \
    --admin-username ubuntu --license-type UBUNTU_PRO

Note the publicIpAddress from the output – you’ll need it to SSH into the VM.

Install Nvidia Drivers (GPU Support)

For GPU capabilities, install NVIDIA drivers using Ubuntu’s package management system. Restart the system after installation.

sudo apt update -y
sudo apt full-upgrade -y
sudo apt install -y ubuntu-drivers-common
sudo ubuntu-drivers install
sudo systemctl reboot

Important: Standard NVIDIA drivers don’t support vGPUs (fractional GPUs). See instructions on the Azure site for installing GRID drivers, which might involve building an unsigned kernel module (which may be incompatible with Secure Boot).

Deploying Ollama with Snap

Snap simplifies the installation of Ollama and its dependencies, ensuring compatibility and streamlined updates. The –beta flag allows you to access the latest features and versions, which might still be under development

sudo snap install --beta ollama

Configuration

Configure Ollama to use the ephemeral disk

sudo mkdir /mnt/models
sudo snap connect ollama:removable-media # to allow the snap to reach /mnt
sudo snap set ollama models=/mnt/models
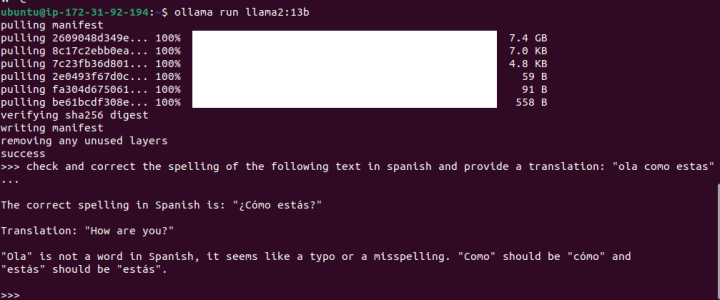
Installing Mixtral

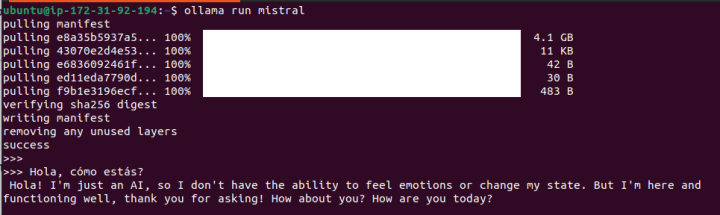
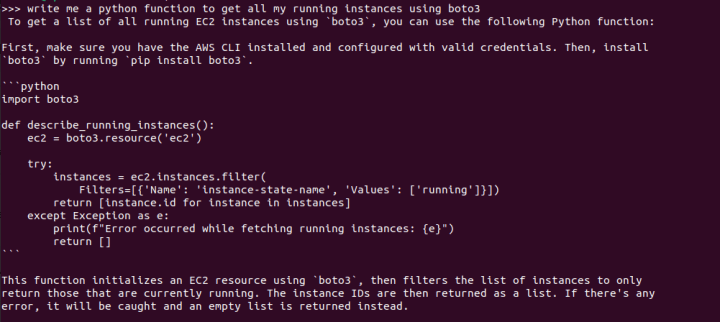
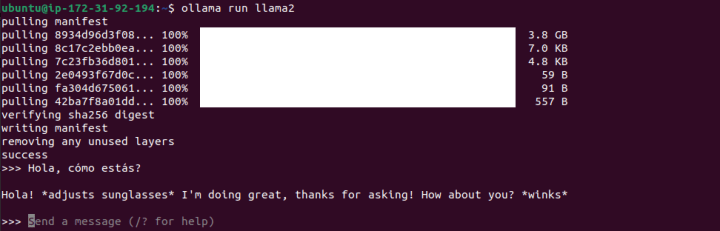
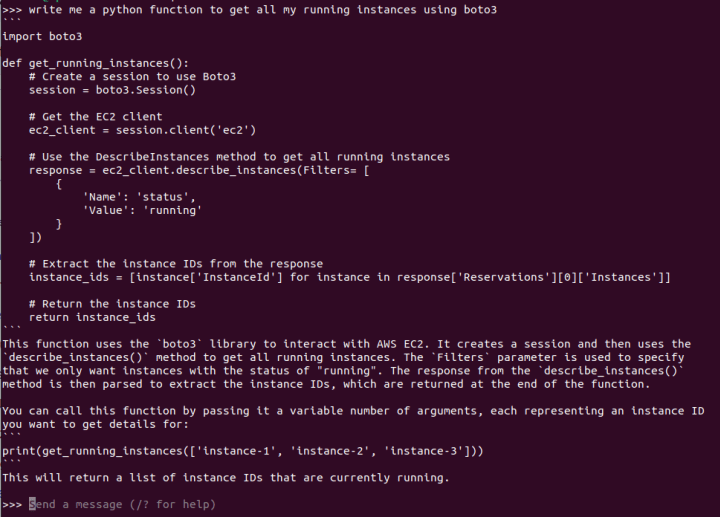
At this point, you can run one of the open models available out of the box, like mixtral or llama2. If you have a fine-tuned version of these models (a process that involves further training on a specific dataset), you can run those as well.

ollama run mixtral

The first run might take a while to download the model.

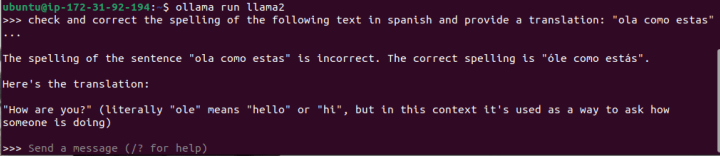
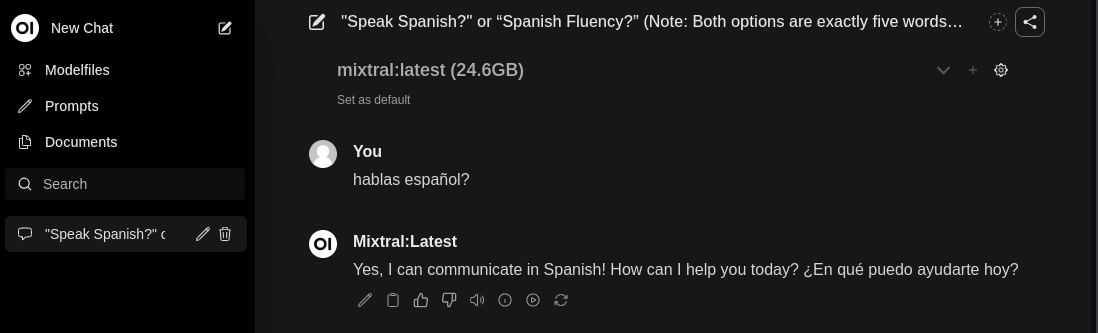
Now you can use the model through the console interface:

Installing a UI

This step is optional, but provides a UI via your web browser.

sudo snap install --beta open-webui

Access the web UI securely

To quickly access the UI without open ports in the Azure security group, you can create an SSH tunnel to your VM using the following command:

ssh -L 8080:localhost:8080 ubuntu@${IP_ADDR}

Go to http://localhost:8080 in your web browser on your local machine (the command above tunnels the traffic from your localhost to the instance on Azure).:

In case you want to make this service public, follow this documentation.

Verify GPU usage

sudo watch -n2 nvidia-smi

Check that the ollama process is using the GPU, you should see something like this:

+---------------------------------------------------------------------------+
| Processes:                                                                |                                                                            
|  GPU   GI   CI        PID   Type   Process name                GPU Memory |
|        ID   ID                                                 Usage      |
|===========================================================================|
|    0   N/A  N/A      1063      C   /snap/ollama/13/bin/ollama     4882MiB |
+---------------------------------------------------------------------------+

Complementary and Alternative Solutions

  • Charmed Kubeflow: Explore this solution for end-to-end MLOps (Machine Learning Operations), providing a streamlined platform to manage every stage of the machine learning lifecycle. It’s particularly well-suited for complex or large-scale AI deployments.
  • Azure AI Studio: Provides ease of use for those seeking less customization.

Conclusion

Ubuntu’s open-source foundation and robust ecosystem make it a compelling choice for deploying open-source AI models. When combined with Azure’s GPU capabilities and Confidential Compute features, you gain a flexible, secure, and performant AI solution.

Generative AI with Ubuntu on AWS. Part II: Text generation

In our previous post, we discussed how to generate Images using Stable Diffusion on AWS. In this post, we will guide you through running LLMs for text generation in your own environment with a GPU-based instance in simple steps, empowering you to create your own solutions.

Text generation, a trending focus in generative AI, facilitates a broad spectrum of language tasks beyond simple question answering. These tasks include content extraction, summary generation, sentiment analysis, text enhancement (including spelling and grammar correction), code generation, and the creation of intelligent applications like chatbots and assistants.

In this tutorial, we will demonstrate how to deploy two prominent large language models (LLM) on a GPU-based EC2 instance on AWS (G4dn) using Ollama, an open source tool for downloading, managing, and serving LLM models. Before getting started, ensure you have completed our technical guide for installing NVIDIA drivers with CUDA on a G4DN instance.

We will utilize Llama2 and Mistral, both strong contenders in the LLM space with open source licenses suitable for this demo.

While we won’t explore the technical details of these models, it is worth noting that Mistral has shown impressive results despite its relatively small size (7 billion parameters fitting into an 8GB VRAM GPU). Conversely, Llama2 provides a range of models for various tasks, all available under open source licenses, making it well-suited for this tutorial. 

To experiment with question-answer models similar to ChatGPT, we will utilize the fine-tuned versions optimized for chat or instruction (Mistral-instruct and Llama2-chat), as the base models are primarily designed for text completion.

Let’s get started!

Step 1: Installing Ollama

To begin, open an SSH session to your G4DN server and verify the presence of NVIDIA drivers and CUDA by running:

nvidia-smi

Keep in mind that you need to have the SSH port open, the key-pair created or assigned to the machine during creation, the external IP of the machine, and software like ssh for Linux or PuTTY for Windows to connect to the server.

If the drivers are not installed, refer to our technical guide on installing NVIDIA drivers with CUDA on a G4DN instance.

Once you have confirmed the GPU drivers and CUDA are set up, proceed to install Ollama. You can opt for a quick installation using their binary, or choose to clone the repository for a manual installation.

To install Ollama quickly, run the following command

curl -fsSL https://ollama.com/install.sh | sh

Step 2: Running LLMs on Ollama

Let’s start with Mistral models and view the results by running:

ollama run mistral

This instruction will download the Mistral model (4.1GB) and serve it, providing a prompt for immediate interaction with the model.

Not a bad response for a prompt written in Spanish!. Now let’s experiment with a prompt to write code:

Impressive indeed. The response is not only generated rapidly, but the code also runs flawlessly, with basic error handling and explanations. (Here’s a pro tip: consider asking for code comments, docstrings, and even test functions to be incorporated into the code). 

Exit with the /bye command.

Now, let’s enter the same prompt with Llama2.

We can see that there are immediate, notable differences. This may be due to the training data it has encountered, as it defaulted to a playful and informal chat-style response. 

Let’s try Llama2 using the same code prompt from above:

The results of this prompt are quite interesting. Following four separate tests, it was clear that the generated responses had not only broken code but also inconsistencies within the responses themselves. It appears that writing code is not one of the out-of-the-box capabilities of Llama2 in this variant (7b parameters, although there are also versions specialized in code like Code-Llama2), but results may vary.

Let’s run a final test with Code-Llama, a Llama model fine-tuned to create and explain code:

We will use the same prompt from above to write the code:

This time, the response is improved, with the code functioning properly and a satisfactory explanation provided.

You now have the option to either continue exploring directly through this interface or start developing apps using the API.

Final test: A chat-like web interface

We now have something ready for immediate use. However,  for some added fun, let’s install a chat-like web interface to mimic the experience of ChatGPT.

For this test, we are going to use ollama-ui (https://github.com/ollama-ui/ollama-ui). 

⚠︎ Please note that this project is no longer being maintained and users should transition to Open WebUI, but for the sake of simplicity, we are going to still use the Ollama-ui front-end.

In your terminal window, clone the ollama-ui repository by entering the following command:

git clone https://github.com/ollama-ui/ollama-ui

Here’s a cool trick: when you run Ollama, it creates an API endpoint on port 11434. However, Ollama-ui will run and be accessible on port 8000, thus, we’ll need to ensure both ports are securely accessible from our machine.

Since we are currently running as a development service (without the security features and performance of a production web server), we will establish an SSH tunnel for both ports. This setup will enable us to access these ports exclusively from our local computer with encrypted communication (SSL).

To create the tunnel for both the web-ui and the model’s API, close your current SSH session and open a new one with the following command:

ssh -L 8000:localhost:8000 -L 11434:127.0.0.1:11434 -i myKeyPair.pem ubuntu@<Machine_IP>

Once the tunnel is set up, navigate to the ollama-ui directory in a new terminal and run the following command:

cd ollama-ui
make

Next, open your local browser and go to 127.0.0.1:8000 to enjoy the chat web inRunning an LLM model for text generation on Ubuntu on AWS with a GPU instanceterface!

While the interface is simple, it enables dynamic model switching, supports multiple chat sessions, and facilitates interaction beyond reliance on the terminal (aside from tunneling). This offers an alternative method for testing the models and your prompts.

Final thoughts

Thanks to Ollama and how simple it is to install the NVIDIA drivers on a GPU-based instance, we got a very straightforward process for running LLMs for text generation in your own environment. Additionally, Ollama facilitates the creation of custom model versions and fine-tuning, which is invaluable for developing and testing LLM-based solutions.

When selecting the appropriate model for your specific use case, it is crucial to evaluate their capabilities based on architectures and the data they have been trained on. Be sure to explore fine-tuned variants such as Llama2 for code, as well as specialized versions tailored for generating Python code.

Lastly, for those aiming to develop production-ready applications, remember to review the model license and plan for scalability, as a single GPU server may not suffice for multiple concurrent users. You may want to explore Amazon Bedrock, which offers easy access to various versions of these models through a simple API call or Canonical MLOps, an end-to-end solution for training and running your own ML models.

Quick note regarding the model size

The size of the model significantly impacts the production of better results. A larger model is more capable of reproducing better content (since it has a greater capacity to “learn”). Additionally, larger models offer a larger attention window (for “understanding” the context of the question), and allow more tokens as input (your instructions) and output (the response)

As an example, Llama2 offers three main model sizes regarding the parameter number: 7, 13, or 70 billion parameters. The first model requires a GPU with a minimum of 8GB of GPU RAM, whereas the second requires a minimum of 16GB of VRAM.

Let me share a final example:

I will request the 7B parameters version of Llama2 to proofread an incorrect version of this simple Spanish phrase, “¿Hola, cómo estás?”, which translates to “Hi, how are you?” in English. 

I conducted numerous tests, all yielding incorrect results like the one displayed in the screenshot (where “óle” is not a valid word, and it erroneously suggests it means “hello”).

Now, let’s test the same example with Llama2 with 13 billion parameters:

While it failed to recognize that I intended to write “hola,” this outcome is significantly better as it added accents, question marks and detected that “ola” wasn’t the right word to use (if you are curious, it means “wave”) .

Join Canonical Data and AI team at Data Innovation Summit 2024

Canonical is delighted to be a technology partner at the Data Innovation Summit (DIS) in 2024. We are proud to showcase our Data and AI solutions through our conference talk and technology in practice sessions. The event will take place in Kistamässan, Stockholm on April 24-25, 2024. Visit us at booth C71 to learn how open source data and AI solutions can help you take your models to production, from edge to cloud.

Data and AI: get first-hand insights from Canonical experts

The modern enterprise can use AI algorithms and models to learn from their treasure troves of big data, and make predictions or decisions based on the data without being explicitly programmed to do so. What’s more, the AI models grow more accurate over time. 

The magic is in the melding of AI and big data. Data of incredible volume, velocity, and variety is fed into the AI engine, making the AI smarter. Over time, less human intervention is needed for the AI to run properly; in time, the AI can deliver deeper insights—and strategic value—from the ever-increasing pools of data, often in real time. 

In today’s competitive business environment, your AI and data strategies need to be more interconnected than ever. According to an MIT Technology Review survey, 78% of CIOs say that scaling AI to create business value is the top priority of their enterprise data strategy, and 96% of AI leaders agree. Nearly three out of four CIOs also say that data challenges are the biggest factor jeopardising AI success.

The Data Innovation Summit is a significant event in the field of Data and AI, especially in the Nordics. It brings together professionals, enterprise practitioners, technology providers, start-up innovators, and academics working with data and AI. We at Canonical are delighted to announce that we will be participating in this event and sharing our expertise in Data and AI.

Canonical is a well-known publisher of Ubuntu, which is the preferred operating system (OS) for data scientists. In addition to the OS, Canonical offers an integrated data and AI stack. We provide the most cost-effective options to help you gain control over your Total Cost of Ownership (TCO), and ensure reliable security maintenance, allowing you to innovate at a faster pace.

Canonical DIS talk: open source DataOps and MLOps

Canonical data and AI Product Managers, and Andreea Munteanu and Michelle Anne Tabirao will be speaking about open source for your DataOps and MLOps.

Talk description

Open source data and AI tools enable organisations to create a comprehensive solution that covers all stages of the data and machine learning lifecycle. This includes correlating data from various sources, regardless of their collection engine, and serving the model in production. Together, DataOps and MLOps drive the collaboration, communication, and integration that great data and AI teams need, making them essential to the model lifecycle. DataOps is an approach to data management that focuses on collaboration, communication, and integration among data engineers, data scientists, and other data-related roles to improve the efficiency and effectiveness of data processes. MLOps is a set of practices that combines machine learning, software development, and operations to enable the deployment, monitoring, and maintenance of machine learning models in production environments.

In this talk, we will explore how to build an end-to-end solution for DataOps and MLOps using open-source solutions like databases, ML and analytics tools such as OpenSearch, Kubeflow, and MLFlow. Professionals can focus on building ML models without spending time on the tooling operational work. We will highlight some use cases, e.g. in the telco sector, where they use MLOps and DataOPs to optimise the telco network infrastructure and reduce power consumption.

Attendees will learn about the critical factors to consider when selecting tools and best practices needed for building a robust, production-grade ML project.

Come and meet us at DIS 2024

If you are interested in building or scaling your data and AI projects with open source solutions, we are here to help you. Visit our Data and AI offerings to explore our solutions.

Learn more about our Data and AI solutions

Generative AI on a GPU-Instance with Ubuntu on AWS: Part 1 – Image Generation

We recently published a technical document showing how to install NVIDIA drivers on a G4DN instance on AWS, where we covered not only how to install the NVIDIA GPU drivers but also how to make sure to get CUDA working for any ML work. 

In this document we are going to run one of the most used generative AI models, Stable Diffusion, on Ubuntu on AWS for research and development purposes.

According to AWS, “G4dn instances, powered by NVIDIA T4 GPUs, are the lowest cost GPU-based instances in the cloud for machine learning inference and small scale training. (…) optimized for applications using NVIDIA libraries such as CUDA, CuDNN, and NVENC.”

G4DN instances come in different configurations:

Instance typevCPUsRAMGPUs
g4dn.xlarge4161
g4dn.2xlarge8321
g4dn.4xlarge16641
g4dn.8xlarge321281
g4dn.12xlarge481924
g4dn.16xlarge642561
g4dn.metal963848

For this exercise, we will be using the g4dn.xlarge instance, since we need only 1 GPU, and with 4 vCPUs and 16GB of RAM, it will provide sufficient resources for our needs, as the GPU will handle most of the workload. 

Image generation with Stable Diffusion

Stable Diffusion is a deep learning model released in 2022 that has been trained to transform text into images using latent diffusion techniques. Developed by Stability.AI, this groundbreaking technology not only provides open-source access to its trained weights but also has the ability to run on any GPU with just 4GB of RAM, making it one of the most used Generative AI models for image generation.

In addition to its primary function of text-to-image generation, Stable Diffusion can also be used for tasks such as image retouching and video generation. The license for Stable Diffusion permits both commercial and non-commercial use, making it a versatile tool for various applications.

Requirements

You’ll need SSH access. If running on Ubuntu or any other Linux distribution, opening a terminal and typing ssh will get you there. If running windows, you will need either WSL (to run a Linux shell inside windows) or PuTTY to connect to the machine using an external software.

Make sure you have NVIDIA Drivers and CUDA installed on your G4DN machine. Test with the following command:

nvidia-smi

You should be able to see the driver and CUDA versions as shown here:

Let’s get started!

Step 1: Create a python virtual environment:

First, we need to download some libraries and dependencies as shown below:

sudo apt-get install -y python3.10-venv
sudo apt-get install ffmpeg libsm6 libxext6 -y

Now we can create the Python environment.

python3 -m venv myvirtualenv

And finally, we need to activate it. Please note that every time we log in into the machine, we will need to reactivate it with the following line:

source myvirtualenv/bin/activate

Step 2: Download the web GUI and get a model.

To interact with the model easily, we are going to clone the Stable Diffusion WebUI from AUTOMATIC1111.

git clone https://github.com/AUTOMATIC1111/stable-diffusion-webui.git

After cloning the repository, we can move on to the interesting part: choosing and downloading a Stable Diffusion model from the web. There are many versions and variants that can make the journey more complicated but more interesting as a learning experience. As you delve deeper, you will find that sometimes you need specific versions, fine-tuned or specialized releases for your purpose.

This is where HuggingFace is great, as they host a plethora of models and checkpoint versions that you can download. Please be mindful of the license model of each model you will be using.

Go to Hugging Face, click on models, and start searching for “Stable Diffusion”. For this exercise, we will use version 1.5 from runwayml.

Go to the “Files and versions” tab and scroll down to the actual checkpoint files.

Copy the link and go back to your SSH session. We will download the model using wget:

cd ~/stable-diffusion-webui/models/Stable-diffusion
wget https://huggingface.co/runwayml/stable-diffusion-v1-5/resolve/main/v1-5-pruned.safetensors

Now that the model is installed, we can run the script that will bootstrap everything and run the Web GUI.

Step 3: Run the WebUI securely and serve the model

Now that we have everything in place, we will run the WebUI and serve the model.

Just as a side note, since we are not installing this on a local desktop, we cannot just open the browser and enter the URL. This URL will only respond locally because of security constraints (in other words, it is not wise to open development environments to the public). Therefore, we are going to create an SSH tunnel.

Exit the SSH session.

If you are running on Linux (or Linux under WSL on Windows), you can create the tunnel using SSH by running the following command:

ssh -L 7860:localhost:7860 -i myKeyPair.pem ubuntu@<the_machine's_external_IP>

In case you are running on Windows and can’t use WSL, follow these instructions to connect via PuTTY.

If everything went well, we can now access the previous URL in our local desktop browser. The entire connection will be tunneled and encrypted via SSH.

In your new SSH session, enter the following commands to run the WebUI.

cd ~/stable-diffusion-webui
./webui.sh

The first time will take a while as it will install PyTorch and all the required dependencies. After it finishes, it will give you the following local URL:

http://127.0.0.1:7860

So open your local browser and go to the following URL: http://127.0.0.1:7860

We are ready to start playing. 

We tested our first prompt with all the default values, and this is what we got. Quite impressive, right?

Now you are ready to start generating!

Final thoughts

I hope this guide has been helpful in deploying the Stable Diffusion model on your own instance and has also provided you with a better understanding of how these models work and what can be achieved with generative AI. It is clear that generative AI is a powerful tool for businesses today. 

In our next post, we will explore how to deploy and self-host a Large Language Model, another groundbreaking AI tool. 

Remember, if you are looking to create a production-ready solution, there are several options available to assist you. From a security perspective, Ubuntu Pro offers support for your open source supply chain, while Charmed Kubeflow provides a comprehensive stack of services for all your machine learning needs. Additionally, AWS offers Amazon Bedrock, which simplifies the complexities involved and allows you to access these services through an API. 

Thank you for reading and stay tuned for more exciting AI content!

❌